Introduction
props, which is short for “properties”, are values we can pass into a component. We can then use these props inside of our component.
What are props?
Props are values we pass into our components using key/value pairs, similar to HTML attributes. These values will then be available inside the component.
<MyComponent myKey="My value" />
Props are what allow us to make a component dynamic.
Props are one-directional, meaning they cannot be changed from inside the component. However, you can change the value that is being passed in as a prop.
Why we might want to use props
Let’s look at an example of why we’d want to use props and the benefit of props.
In the example below, we have a component called <Product>, which displays a message with a hardcoded product title and product price: Milk: 24.99:
function Product() {
  return <p>Milk: 24.99</p>;
}

function App() {
  return (
    <div>
      <Product />
    </div>
  );
}
The component above is problematic because it can’t be reused as it’s always going to display the Milk product.
We could instead be passing in the product title and the product price. The component itself wouldn’t care where the data is coming from, it only cares about displaying the product title and product price.
Let’s see how we can use props to make this component dynamic.
How do props work?
Props work by passing key/value pairs into a component. These key/value pairs would then be in the props object available as the first parameter in a component.
Adding a prop to a component is incredibly simple and requires no setup. We simply add a key/value pair as attributes in the component tag, and then this key/value pair will be available inside the props object of the component.
Below is an example of how we could pass in a title prop with the string of value Milk and a price prop with a number value of 24.99.
<Product title="Milk" price={24.99} />
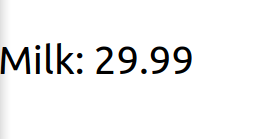
Let’s adjust the initial example to take in a title and price prop.
import React from 'react';

function Product(props) {
  // The props we pass into a component are available via the
  // "props" parameter of a component.

  // Using console.log to show you the contents of the object
  // which you'll see contains the props we passed in
  console.log(props);
  // Logs:
  // {
  //   "title": "Milk",
  //   "price": 29.99
  // }

  return (
    <p>
      {/* Display our title and price values */}
      {props.title}: {props.price}
    </p>
  );
}

function App() {
  return (
    <div>
      {/* We pass in a "title" prop and a "price" prop */}
      <Product title="Milk" price={29.99} />
    </div>
  );
}

export default App;

The above changes have made our component dynamic.
We could change the title and price props to whatever we’d want, and our component would display these new values without any changes to the component itself.
Using our dynamic component
Let’s expand on the example above and reuse our component to demonstrate that it’s dynamic.
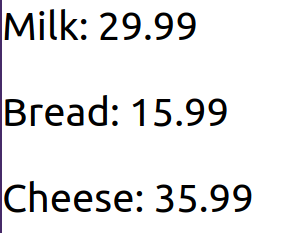
In the example below, we have called our component two more times but with different values. We now have three different products, all using the same component.
import React from 'react';

function Product(props) {
  return (
    <p>
      {props.title}: {props.price}
    </p>
  );
}

function App() {
  // We will now create use our component 3 times
  // but with different values in each
  return (
    <div>
      <Product title="Milk" price={29.99} />
      <Product title="Bread" price={15.99} />
      <Product title="Cheese" price={35.99} />
    </div>
  );
}

export default App;

Video
Lesson task
Goal
For the student to understand how props work.
Brief
Create your own component that takes in at least three props.
NOTE: Lesson tasks do not get submitted on Moodle and are not assessed by tutors. They are mainly there for you to practise what you have learnt in the lesson.
Level 1 process
-
Create a component, such as
<Person>. -
Add three props to this component, such as
firstName,lastNameandcity. -
Display this component to the screen using random values you’d like to use.
-
Reuse this component again, but use different values this time.