Introduction to using git in a terminal
Git is a Version Control System(VCS) technological solution designed to aid tracking of file changes in agile teams. It is free, open-source and distributed. With git, team members can contribute to one or more projects seamlessly. Unlike other VCS, such as Subversion(SVN), Git lets each individual in a team have their own separate repository. In other words, each individual has a full copy of the main repository(project) and can work on it separately with or without a network connection. So, if the main repo is corrupt, either of the team members can bring it back to life with the copy on their local system. There are two typical methods for working with git. Git interactions can be done through the Terminal or on the Github desktop. Although using a terminal is more complex, it is the better option.
Command Line (Terminal)
Command Line is a text-based user interface to interact with the files and folders in the computer. The interaction with the files and folder can only be done by executing commands. Command Line interface can vary from one operating system to another. While there is “Command prompt” for Windows, there is “Terminal” for Mac.
Common CLI command includes:
-
ls: List the folder in a folder. This works by default in Mac. For Windows, you can usedirinstead. -
mkdir: Creates a new folder/folder. For example,mkdir newFoldercreates a new folder named newFolder -
cd: Changes folder. For example,cd newFolderchanges folder to newFolder. -
touch: Creates a file in terminal. For Windows,typeorcopyare the equivalents. For exampletouch index.css// creates a css file named index.css in terminal.type nul >> "index.css"// creates index.css file in command prompt.copy nul "index.css"// creates index.css in command prompt.
-
rm: removes a file in a terminal. For Windows.delcommand is the equivalent. For example,rm index.css// removes index.css in terminaldel index.css// removes index.css in command prompt

How to load CLI
- Window: Press windows key, type command prompt and click command prompt
- Mac: Application > Utility > Terminal
Git Mental Model
Git is like a tree on which you have a root, branches, and leaves. The root of a tree can be likened to the HEAD(main branch) in git, the branches in the tree can be likened to branches in git, while the leaves on the branches can be likened to file changes on a branch in git. There are three basic areas where file changes reside in the git technology. They include:
- The working folder
- The staging area
- The repository(remote or local).
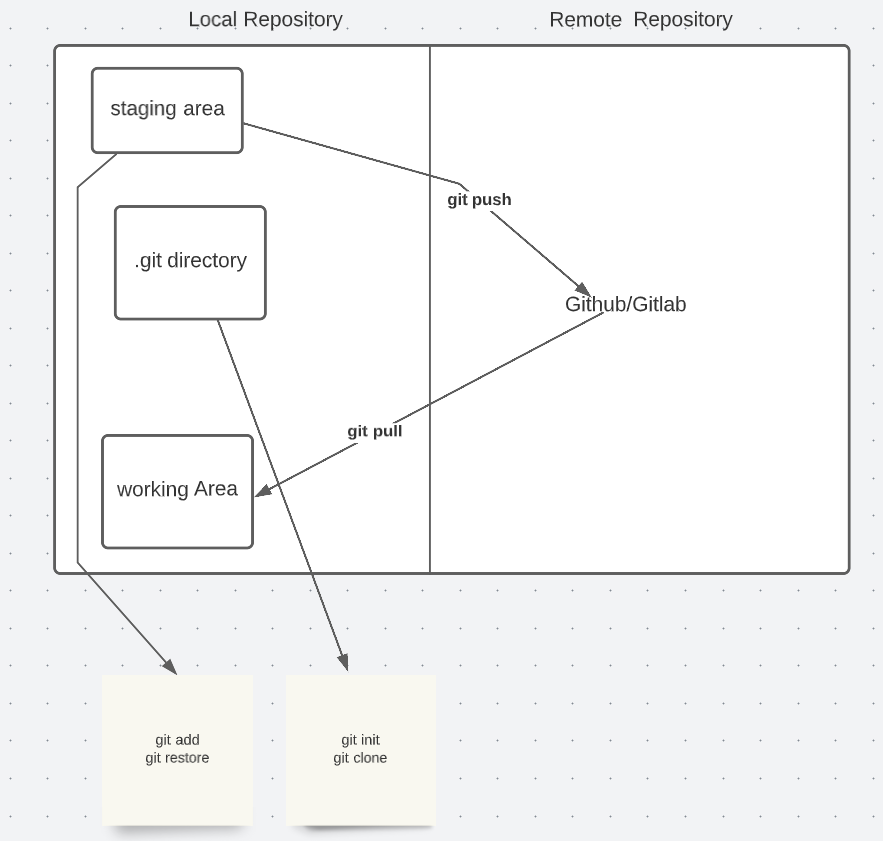
The working folder
This is the git area where the untracked file changes reside(shown above). Git is aware of all the changes in this area, but it has not been informed to track them. That is, git cannot say what has changed about what file. Common git commands that are useful in the working area are git status, git add, git branch, etc.
The Index(staging area)
This is the area of git where tracked file changes are kept. In this area, git knows what files have changed. It is an area between the working folder and the repo (remote or local). Common git commands here are git status, git commit, git restore, etc.
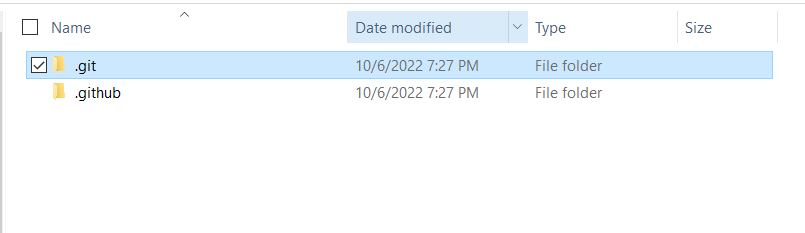
The repository (Local and Remote)
This is the area of Git where branches and the HEAD live. On the local side, it is where you have the .git folder. The .git folder is hidden in every repository you create. Git commands will not work in any project folder that does not have .git folder. The remote repository, on the other hand, is hosted on Github or Gitlab and there is a need for a connection to access it. Common git commands include git pull, git push and git clone.
Definition of git commands
git init
This command is used to transform an ordinary folder to a local git repository. The execution of git init command in a terminal tranforms the current folder to a local git repository by creating a “.git” subfolder in it.
Syntax
git init // creates a .git subfolder in the current folder.
git status
This command is used to get information about the current state of git in the local repository. Usually, it gets information about both the tracked and untracked file changes.
Syntax
git status// print info about the tracked and untracked file changes.
git branch
This is a git command used to get the list of branches in a local repository as well as create a new branch.
Syntax
The syntax of git branch is git branch for getting the list of branches in the local and git branch [new branch name] for creating a new branch. Also, you can git branch command to rename a branch. See an example below.
git branch// get the list of branches.git branch first-task//creates a new branch.git branch -m updated-first-task//update name of the current branch.
git checkout
This is a git command used to switch from one branch to another. It can also be used to create and switch to a particular branch.
- Syntax
The syntax of git checkout is git checkout [branch name] for branching to an existing branch and git checkout -b [new branch name] for creating a new branch. See an example below.
git checkout first-task//switch to first-task branchgit checkout -b second-task// create branch second-task and switch to the branch instantly
git add
This is used to move untracked file changes to the git index. It can be used to add all untracked file changes at once or individually.
Syntax
The syntax of git add command is git add [list of files or all files(.)]. For example, let’s say one has two files untracked (about.html and index.html). One can add the changes to the staging all at once or individually. See an example below.
git add .// tell git to add all untacked file changes to staginggit add about.html index.html// tell git to add about.html and index.html
git commit
This is a git command used to move tracked changes from staging to the local repository. It is usually preceded by the git add command and can only be successfully executed with a message. The message is more like a label for the incoming changes.
Syntax
The syntax of the git commit command is git commit -m '[short meaningful text describing the incoming changes]. For example, say one has some social links newly added to about.html. First, one needs to add the changes to staging and then commit them. See the example below.
git add about.html// add the new changes in the about.html to the staginggit commit -m 'update the social links'// commits the changes to the local repository (.git folder)
git push
This command is used to move committed changes in the local repository to the remote repository(gitlab or github).
Syntax
The syntax for the command can either be git push origin -u [branch name] or git push depending on whether or not the push is being done for the first time for the branch. See an example below.
git push origin -u update-links// push to the remote branch for the first time.git push// subsequent pushes
git pull
This command gets the latest change from a branch in the remote repository.
Syntax
The syntax for this command is git pull. Before a pull command can be executed, one needs to be in the preferred branch. However, in some cases, git pull could result in a merge conflict as a result of the difference between local changes and remote changes. A simple example is when one wants to get the latest changes from the main branch after a recent merge. See an example of the git pull command below.
git checkout main// switches to the main branch in the localgit pull// gets the latest changes from the remote main branch
git clone
This is a git command used to download a remote repository to the local.
Syntax
The syntax of the git clone command is git clone [url of the remote repo]. For example, say one wants to clone the cross-course repo from github to his local in noroff-project folder. One needs to get the url of the repo and run the git clone command in the terminal. See an example below.
cd noroff-project// move into the preferred foldergit clone https://github.com/Noroff-FEU-Assignments/cross-course-project-sulenchy// clones the remote repocd cross-course-project-sulenchy// move into the local repo cross-course-project-sulenchy
Activity
Activity 1
Command Line Interface Crash Course (30m)
Lesson Task
Brief
For this task, we want you to practice the use of Command Line Interface to run git commands.
Level 1 Process
- On the terminal, browse to the “documents” folder using the
cdcommand - Make a folder with the name “git-intro-task” using the
mkdircommand - Create a js file with the name “index.js” using the
touchorcopycommand.
Level 2 Process
- Open your Command Line Interface (CLI)
- Change folder to the “git-intro-task” folder if you are not there already.
- Delete the “index.js” file using the
rmordelcommand - Using git clone command, clone the repository at
https://github.com/Noroff-FEU-Assignments/git-cli.gitto you preferred folder. - In the
index.htmlfile, add a p element with the text “Getting started with git CLI” as stated below.<p>Getting started with git CLI</p> - Add the change to the staging area using the git add command.
- Commit the change to the staging area using the git commit command.
- Push the change to remote repository using git push ccommand.
- Comfirm the change on github.