Introduction
To display your websites on the World Wide Web, you need to use a hosting service where you can upload the latest version of your web pages and other files.
Most web hosts also manage your domain name registration, enabling you to set up your website in one service.
For your studies with Noroff, we’ll mostly use Netlify to deploy our sites. The only time you will need to use a web host will be for the Content Management Systems course, where you will need to install a WordPress website, and you will need to create at least one database.
Types of hosting
Shared hosts
One server will host multiple sites, sharing your bandwidth with other customers. This can mean that if there is a spike on another site on the shared server where the bandwidth is being used by them, then your overall service will suffer.
This is the cheapest option and is good for small businesses that aren’t too worried about bandwidth fluctuations.
Virtual Private Server
A VPS is similar to a shared host in that one server hosts multiple sites. However, each site has its own resources and is protected from bandwidth issues should another site receive a surge in traffic.
This is a bit more expensive than shared hosting, but cheaper than dedicated hosting. It’s a good middle ground for a website that wants to make sure it doesn’t get affected by others.
Private hosts
Private or Dedicated hosting is for sites that require a lot of server resources. It is the priciest option but offers bigger companies great flexibility and dependability.
The downside is that many hosting services require you to manage the backend and technical issues. So, this option is really for the larger organisations that have the technical capacity.
Cloud hosts
Cloud hosting differs from a shared host since it does not have to run on the same box – it may be spread over many servers - and is scalable. In other words the service may expand or contract based on the overall needs.
Choosing a web hosting service
Things to be aware of when choosing a web host:
- Web space
- Mail services
- Analytics
- PHP/MySQL/Database services
- Redirecting
One way to evaluate which web provider to choose is by considering the three “S”’s: Speed, Support and Security.
Speed
You want a web host that provides you and your end users with documents that are served quickly and reliably, with minimal “downtime”. You have probably experienced the frustration of not being able to access a website because of some mysterious technical problem – you didn’t like it, and nor will your clients!
Support
The second consideration is support: You want a web host that will help you with any potential problems you may be having – whenever you need that help. This is especially true if it is your first time using a web host. It is worth checking a host’s support service before registering. Many hosting services offer email support, but how quickly do they respond? Do they offer telephone support? What are their available hours?
Security
The final consideration is security: This may seem like a given but having a web host with robust security is critical. You want to know that your files are safe and sound – you don’t want your site hacked!
Other
Other considerations for choosing a web host:
- Proximity. It is doubtful you will ever visit your hosting service, but it’s a good idea to choose a service in the same country and time zone as you are.
- Price. While there are many dirt-cheap hosting services available, it is worth remembering the adage: “you pay peanuts, you get monkeys”! Finding a reasonable balance between price, features, support, and reliability is a challenge. Overall, domain name registration is not expensive, and the price of a web hosting service should also not be expensive. That said, the cheapest services tend to be cheap for a reason – either by having fewer services on offer, less support, or worst of all, poorer quality. These are best to avoid! Most hosting services will charge by the year, so it is always possible to change your provider if you find you are especially unhappy with them.
- A domain name. It is best to choose a concise domain name that must include something about yourself. For example, that you are a budding front-end developer, and a highly creative person! You will find that many of the shorter domain names are taken, so it is prudent to think carefully about the domain name that you pick. You will also see that some of the names unavailable on top-level domains, like .com and .net, might be available on some of the newer top-level domains, like .tv and .co. It is important to remember that if you choose one of the newer top-level domains you may risk having your website be confused with somebody else’s!
- Web space. How much space do you need on your web host? That depends on how you plan to use it. Hosting services typically parcel webspace in Gigabyte bundles – from one Gigabyte to possibly hundreds of Gigabytes. To start with, it is worth planning for more than you think you will need - it is likely your needs will grow with your expertise. For this course, we recommend a minimum of 1GB web space to start with. Another thing to be aware of is most hosting services bill annually – so while a monthly cost may seem cheap, you will most likely have to pay for a specific period (usually a year) up-front. It is worth reviewing the terms of service of various providers to avoid disappointment and allow you to change to another provider if necessary. For this reason, it is worth owning your domain name yourself rather than leaving that up to your hosting service. “Why not just host documents from your home computer?” is a question many people ask. While this is not hard to implement, you will then have to provide the three “S”’s yourself – and hope your machine never crashes! Professional hosting services have the experience and infrastructure to handle these problems, so it is advisable that you get a web host – they are not that expensive.
- Email, Web Analytics and other hosting services. Another thing to consider when shopping around for hosting services is what else they offer. Many host services include email hosting, which is great as it allows you to set up email under your own domain name. Once you start producing content, you will no doubt begin to wonder who is coming to your pages and looking at them. Many web hosts provide web analytics services, which will give you statistics of how many “hits” your website has had, and where those hits came from. Several larger content companies (like Google) also offer free web analytics services. Analytics will enable you to view and analyse web traffic - to see who is viewing your web pages, and where they are in the world. (NB: this is anonymous – you can see how many people viewed your page, but not who those people are). This data may be used to gauge who your audience is, what they do when they come to your website, and how your site performs according to your goals.
File Transfer Protocol (FTP)
FTP, as mentioned before, is another protocol that has been designed to work on top of a TCP/IP network like the Internet. It is specifically used to transfer files between two machines, most commonly a client and server. While many web browsers support FTP (among other protocols), there are also dedicated applications for FTP.
NOTE: FTP is purely for transferring files. If you want to share your website, for example, submit a link as an assignment, you must use an HTTP/S URL.
How FTP works
FTP works in much the same way as HTTP; the difference is that one transfers files, the other hyper-text. FTP uses a server-client architecture with users having to log in to provide authentication. Some FTP servers allow anonymous access or are open to the public.
Files are transferred between two computers: the local host machine (user’s computer) and the remote host (usually a server). The local machine connects to the remote host’s IP address, and then a username and password provides authentication. The local machine can then download and upload files from the remote host.
FTP client
You can use your browser to navigate around a server using FTP, but it’s a bit clunky. You can try going to ftp://ftp.adobe.com/pub/adobe/ and you’ll be able to browse Adobe’s public server. With a browser you can only download files unless you use a special add-on.
The main benefit of FTP is that it gives you the ability to upload and make changes. Therefore, an FTP client is the best way to go. You can use a dedicated client such as FileZilla or a built-in FTP client in an IDE or a developer’s text editor like Dreamweaver. Using an FTP client, you can easily make changes without having to learn and use any of the protocols by hand.
Login
The following is an example of an FTP login:
site: ftp.example.com
login: user123
password: 12345
port: 21
Here is what the above login is doing. ‘site:ftp.example.com’ is the address of the server we’re going to access. Then we see the username and password, and finally, the port that should be used.
There are several ports for a server. They are a bit like doorways into the server reserved for specific functions. FTP uses 2 ports: one for commands and one for data. These two ports are by default 20 and 21.
How to find FTP credentials
Web hosts differ slightly in how they present information.
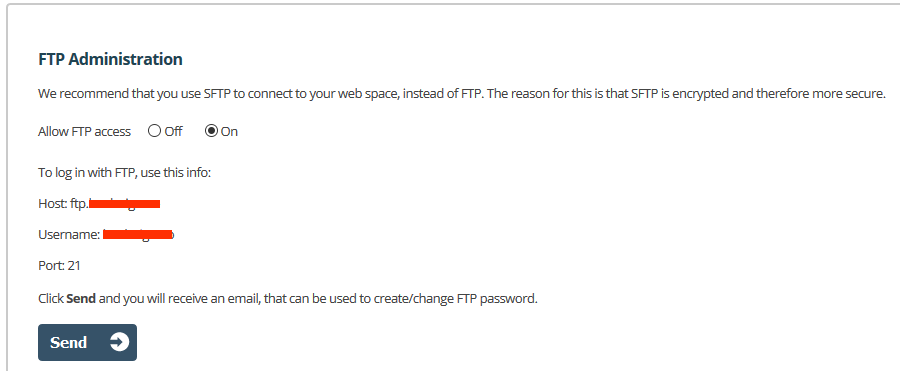
On one.com you can find your FTP credentials under ‘SSH and FTP’.
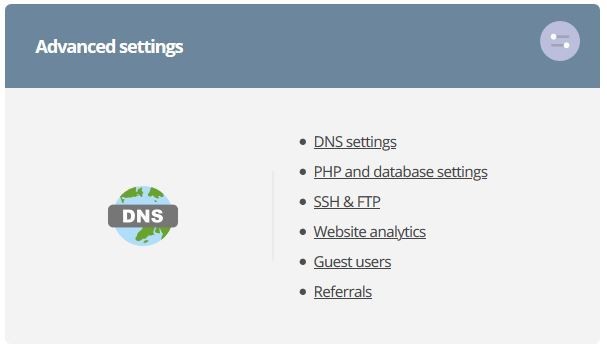
Then you can go to FTP Administration, copy the credentials, and send yourself the FTP password to use on FileZilla.
Different web hosts will have different ways of finding this information, but it should be relatively easy to find. Most web hosts have a help section that will guide you through finding FTP credentials on their system.
public_html
The public_html folder is the root folder for your domain and is where you should upload all your files and folders that you want to display on your website. If you connect using an FTP client, it’s likely you’ll be taken straight into the public_html folder. If you’re uploading files and they aren’t coming through on the web, make sure you’re uploading them to the public_html folder. You can do this by logging onto your web host and going to their File Manager in cPanel. Occasionally web hosts use a ‘www’ folder which is just a symbolic link to the public_html folder, and your files can be uploaded there.
index.html
Inside the public_html folder, you should have a file called ‘index.html’ (or sometimes ‘index.php’). This file is the home page for your website; for example, if a user lands on www.website.com, the server knows to show the index.html. Therefore, when working with your projects, it’s important that the home page is always called index.html.
File management
File management is critically important to front-end development. Files are the basis of everything we do, so keeping everything organised and neat is essential. Often multiple people will work on the same project over many years and, to make this collaboration work, you need the file structure and naming to be logical.
File structure
When starting out in a project, it’s best to try to get an understanding of what files you have and how best to lay them out. Ask yourself: how many different pages, files and components do I need, and how do they interact with each other?
For simple websites, it’s often best to simply create macro folders for your different file types: HTML, CSS, images etc. These folders can then be divided further into subfolders such as “images/products/productimage1.jpg”. When too many files are situated in one folder, it can start to get messy and difficult to know what goes where. Use descriptive folder names that will make sense further down the line.
This file structure will develop and become more complex as we add JavaScript in, but we can keep things simple for now.
Naming conventions
Choosing your naming conventions is somewhat down to personal taste, but there are some best practices to follow.
-
Use lowercase lettering. It can get confusing to remember which elements had capital letters and which didn’t. Staying consistent is essential.
-
Don’t use special characters. When you use special characters like # % & * or blank spaces, for example, the computer will try to show it using the ASCII characters it does have. You’ll probably have seen a file with %20 in place of where the space was. This is not good for file names. You should rather use underlines or hyphens.
-
Don’t use full stops. Using dots (.) will URL as whatever is after the dot will read as a file type. If you have the URL www.example.com/file/my.name.pdf - it could then try to pull up a file type of “.name”, which will result in an Error 404 page.
There are different ways of using underlines and hyphens, but one way is to place underlines between elements and use hyphens to separate words of the same element, for example: header_icon_question-mark.jpg.
Go from general to specific. Start broader and then narrow into that specific element. In the example above, header is a general image grouping, but then I get more specific by saying it’s an icon and finally saying it’s the question mark icon. There could be a header_icon_home.jpg as well.
For your studies with Noroff
Because you are handing in many assignments for this program over various subjects, you should maintain a logical system for organising files.
Netlify
Netlify provides hosting for web projects, including applications and static websites. One of the main advantages of Netlify is that it offers continuous deployment through Git, so we can push changes to our repository on GitHub and it will automatically be pulled through into our Netlify site.
You can go to https://app.netlify.com/signup to sign up on Netlify. You will only need a free account for your studies at Noroff. The easiest option is to sign up with your GitHub account. Next, create a ‘New site from Git’ and under ‘Continuous Deployment’, choose GitHub. Once you’ve given Netlify access to your GitHub account, you will see a list of repositories and you can choose the repo you’d like to use for your site.
Once you’ve finished, you should have a link to your site on Netlify.
Activity
WATCH
The below video (2m 44s):
Lesson task
Goal
Create an account on Netlify and deploy a site using their service. Brief Register with Netlify and deploy a new site from Git.
Level 1 process
- Before you deploy on Netlify, ensure you have a repo on your GitHub account with an index.html file in it. The file can just have some text in it (just something to see that the page is being pulled across).
- Go to https://www.netlify.com/ and register. You might find it easiest to use your GitHub account.
- Click the button for ‘New site from Git’.
- Use Continuous Deployment to connect to GitHub and choose the repo you created in step 1.
- Deploy the site and click across to see your repo being deployed.