Introduction
In this lesson, we look at how to manage and organise files to make development as easy as possible.
Organising files
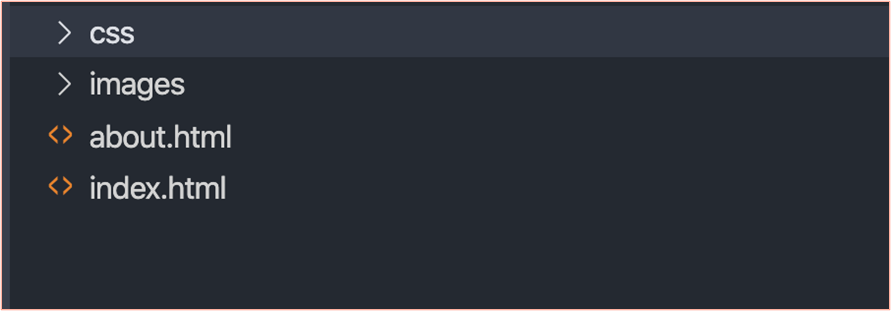
Using a clear folder structure and proper naming conventions is good to make development as easy as possible. Create a folder on your computer for each project you are working on. We can add files and additional folders to this empty folder. The base folder for your project is called the ‘root’ folder. We can keep our HTML files for smaller sites in the root folder. Additional files, such as images, CSS files, and JavaScript files, can all be placed into separate folders so that they are easier to manage.
Here is an example.
Naming
The home page for a website should always be called index.html. The server looks for a file called index.html to serve as the home page. If a user lands on www.website.com, they will see www.website.com/index.html.
Your other HTML files should have logical names. The contact page should be contact.html, the about page about.html and so on.
Linking pages together
A website is a ‘web’ of connected or ‘hyperlinked’ files. An anchor tag is used to link one file to another – it looks like this: <a href="about.html">About</a>
It’s important to note the use of the HTML attribute href to set where the link is supposed to go to. It’s also important to see how the text is hyperlinked and enclosed inside the anchor tags.
File paths
We need to know the file path from A to B to link files together. A is the file we are currently working on, and B is the one we want to connect with.
- In the above example,
about.htmlis in the same folder as the page we are working on. - To reference a file in a subfolder, write the folder name followed by the file name:
<img src="images/logo.jpg"> - If there was a folder inside ‘images’ called ‘branding’, and the logo was in that folder, then we’d use:
<img src="images/branding/logo.jpg"> - These first three examples show how to move files down into directories. If you need to access a file in a folder above the one in which you are working, then you’d use two dots
../:<a href="../splashpage.html">Splash page</a>
These ways of linking pages together are all relative file paths, and for any files on your server, it is best to use relative file paths. One of the most significant advantages to this is that you will not need to change any links when uploading your files from your computer to your web host and can thus upload the root folder directly.
An absolute file path is a URL just like you’d see in your browser tab, and should be used to link to content on another server that you don’t control.
<a href="http://www.website.com/latest.html">link</a>
Linking to Sections on an HTML page
Sometimes we don’t want to link to a different HTML page but rather a different section on the HTML page the user is on.
To do this, we set an ID on the HTML element we want the user to go to
<article id=”article”>
And we add a link to the article.
<a href=”#article”>View article</a>
The following video shows how to link to sections on an HTML page and use the scroll-behavior: smooth CSS property to scroll the user to the section they’ve clicked on.
Images
Images are added to HTML files using the <img> tag. One important thing to note about the <img> tag is that it is self-closing. Most HTML tags have an opening tag and a closing tag, but the tag is self-closing for elements where content cannot be nested inside.
<img src="images/picnic.jpg" alt="A family having a picnic in a park">
Alt text
- Alt text is added to an image tag to explain something about the image.
- It is vital for people who use assistive technologies to know what the image is about. For example, if you are visually impaired, your assistive technology will read out the alt text.
- Because the alt text is so important, it should be descriptive and clear.
- Alt text is also important for SEO, so search engines know what the image is about and how it relates to the content.
Images as content
- Images added into the HTML should be added because they are part of the content.
- If the image is for styling, then it should be added using CSS. We will get onto adding images with CSS later in the course, but for now, it’s important to understand that the images you add to HTML should add to or support the content.
Image sizing
- Image sizing should be handled using CSS rather than inline HTML.
- If HTML is purely used for content, and CSS for styling, then their sizing is best kept separate. We will get onto image sizing in CSS.
Image file sizes
- Page load times should be as short as possible to avoid users getting annoyed and leaving.
- One area that can make a big difference to page load times is image sizes. The smaller the images, the faster the load time should be. On this programme, we recommend that image sizes should be no more than 200kb.
- To keep image sizes down, you can use a format like JPG, which has good compression. PNG is useful for things like logos, but if you’re adding a picture, then JPG is usually best.
- You can also reduce the dimensions of the image. See how big the image needs to be on the page. If the largest image is 500px wide, then resize your image to be 500px wide. If you need the image to be full width, you should be able to resize the image to around 1600px; adjust the quality, and still keep it under 200kb.
- Photoshop has excellent image compression and should be used if possible. An alternative to Photoshop is a free application such as Paint.NET.
- For bulk resizing, consider using a tool called Faststone Photo Resizer.
Lesson Task
Brief
There are practice questions in the master branch of this repo.
Attempt the answers before checking them against the answers in the answers branch of the repo.